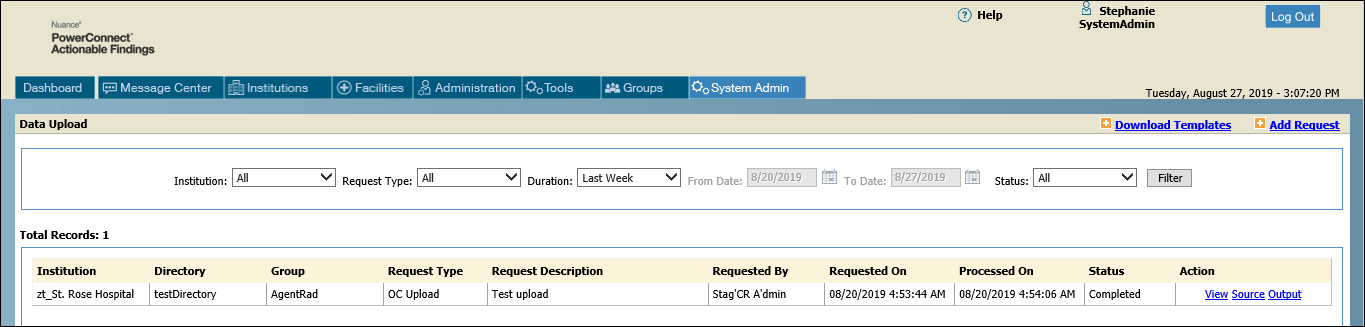
The Data Upload item allows you to view results from your current and past uploads.
To see the results from current and past Data Upload Requests:
1. Click System Admin > Data Upload.
2. Select one or more of the filters (Institution; Request Type; Duration; From Date; To Date; Status).
3. Click Filter. Previous data uploads that match your filters appears in the list.
The following list describes the possible statuses for uploads:
Completed: Successful upload of all data.
Failed: No records exist in attached Excel worksheet, or columns are blank.
Partially Processed: Some records were uploaded successfully but other records contain information that is incorrect or missing.
Pending: Status shown before the file begins uploading.
In Progress: The upload has begun and the worksheet is being processed.
Validation Failed: Invalid data was detected in the Excel worksheet.
Suspend: Click to temporarily suspend the upload process.
Resume: Click to resume the loading process (after suspending).
Click the View link to see the results of your upload, as shown in the example below:

Click the Source link to view or download a copy of the original Excel worksheet you uploaded.
Click the Output link to view or download a copy of an Excel worksheet that contains your original upload file with two additional columns appended to the end: Status and Error Message. If a record was successfully added, the Status column will show Add. If a record failed to update, the Status column will show Validation Failed, along with an error message in the last column.