When adding a new ordering clinician (OC), or editing an existing one, you can assign the OC one or more hospital IDs. You can also edit and delete hospital IDs from this location.
To manage Hospital IDs for an OC:
1. Click Institutions > Add/Edit OC Directory and select an institution from the drop-down list.
2. Click the OC directory name link.
3. Find the OC you want to manage and click the link on either their first or last name to open the Edit Ordering Clinician Information window.
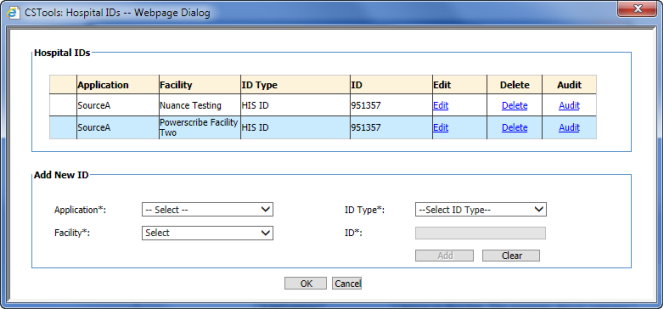
4. Near the bottom of the window, under the Hospital Configurations section, click the Hospital IDs link. The Hospital IDs window opens. (For a new OC, the Hospital IDs section is empty. If the OC is currently assigned a hospital ID, any ID assignments appear in the window.)
5. Use the table below the illustration as a guide when entering the information.
6. When finished editing or adding an ID, click Add.
7. When finished editing or adding all IDs for this OC, click OK to close the Hospital IDs window.
Section |
Field |
Description |
Hospital IDs |
Edit |
Click to edit the ID. Note that the Edit link now offers two options: Update or Cancel. |
Delete |
Click to delete this user ID for the OC. |
|
Audit |
Opens the audit window for this hospital ID. |
|
Add New ID |
Application* |
Select the application for which you want to add a new hospital ID for this OC. If your institution does not use the Manage Bridge Service (MBS), you will only see one choice in this list. The example above contains only one choice (SourceA) as the application name. NOTE: You might see the name Non MBS User in this field. |
Facility* |
Select the facility to which you want to add this OC, or select All to apply to all facilities. |
|
ID Type* |
Select an ID type from this drop-down list. |
|
ID* |
Enter the actual ID, which can be numeric, alphabetic, or a combination of both. |